Monday, August 24, 2015

The Evolution of Art Work.


So I was about to say lets start at the beginning – but that is almost to difficult to pin point.   So I guess we should start with a drawing.  


I drew this partially as a response to having access to new technology.  Namely a CNC router, I am a competent wood worker and yes given the time and frightening number of jigs I could make this.  But the router cut 6 sheets of 4 foot x 4 foot concentric circles with flat spots to lay glass on in about 3 hours.  Which gave me an amazing number of part.  Ironically enough this piece has not progressed much farther than this, I am struggling with some hardware issues.  That and I am being indecisive. I have the wood and glass made but have not figured out what the bolts will look like, I might need to black smith them.  
     In order to fabricate the above image I need 36 or 37 pieces of 3 ½” in x 16 “ glass with two holes drilled in them.  The glass drilling process breaks glass sometimes so you make extra,  maybe 60 of them striving for constancy of color.  60 pieces of glass that size at about 6 pounds a per piece is roughly 360 pounds as one would expect that much glass takes up space and even if you weren’t inclined to obsessively stack things (which I am) I ended up stacking a lot of rectangles.  I liked the little sketches this stacking process created.   This brought to me changing the color of the tank to create an analogous but different set of colored rectangles and then I started cutting and polishing them to create a wider variety of shapes.  Which lead to this piece called Meditations on Stacking

 Which I installed a couple different times, and each time the piece looks similar but pronouncedly different.  As one might guess its a meditative but precarious process.  Next I decided I wanted bigger bricks to play with. The didn’t really work with the obsessive stacking but they worked great with some of the rings/barrels/wheels I had cut earlier. 


Then the summer happened and I couldn’t keep making glass because our furnaces go cold so I turned my eyes to the hundreds of pounds of glass I had stacked in various nooks and crannies around the studio.   


Which was rapidly followed by

Drekar


Argo

Both three of these wood structures I just started chopping 
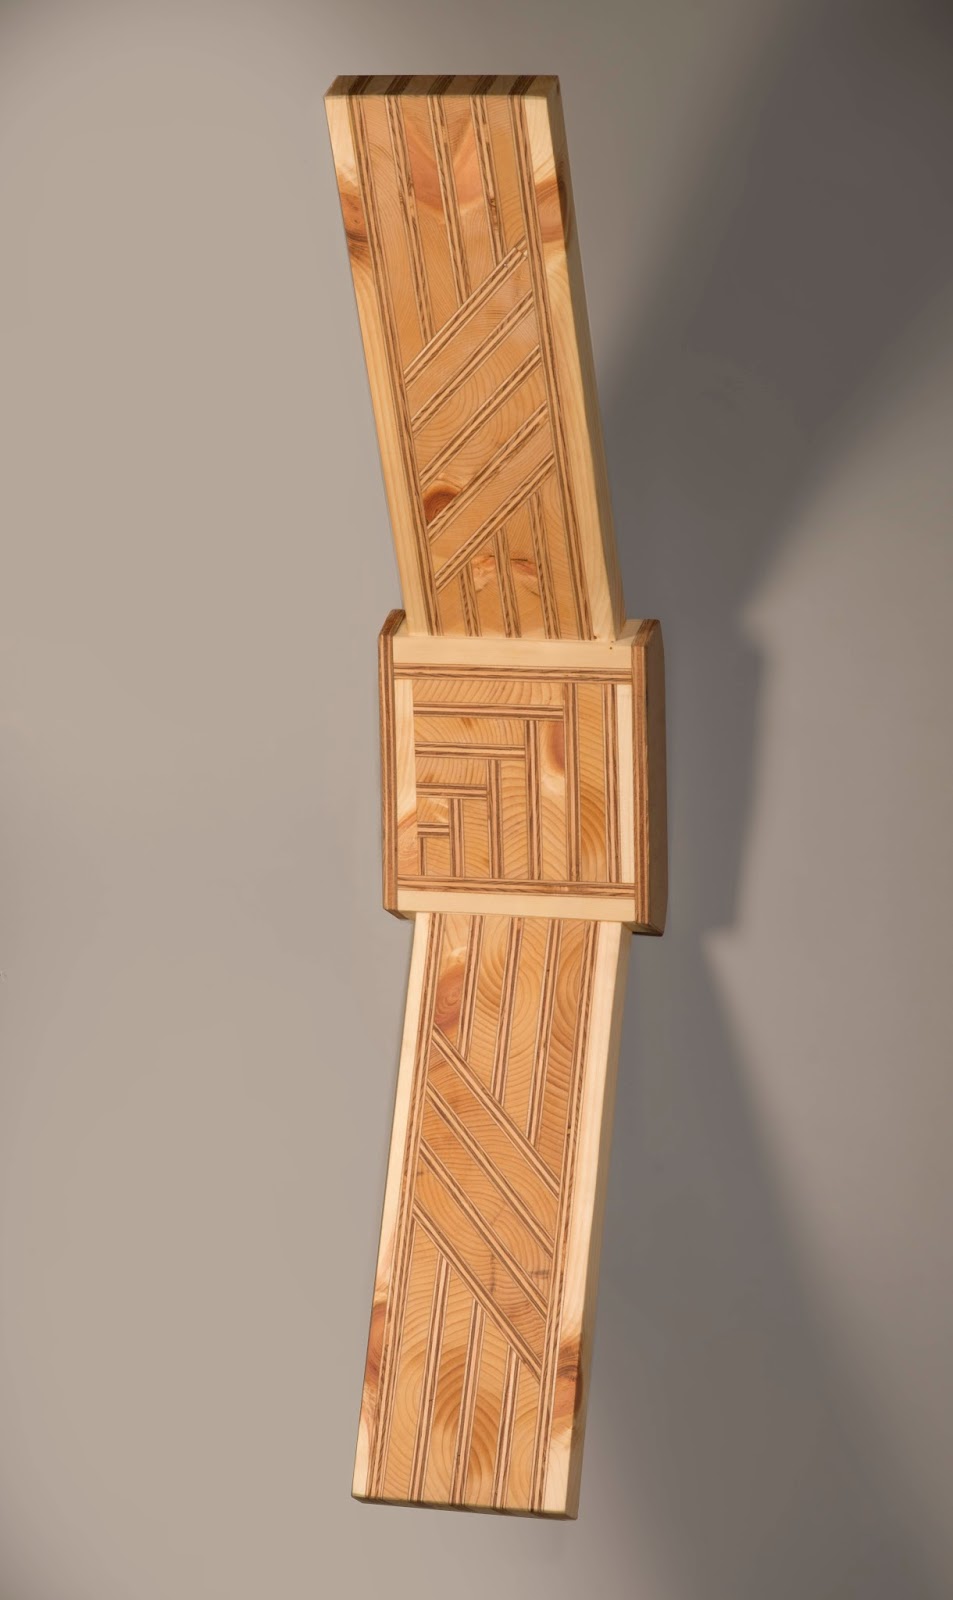
up the rings I had cut on the CNC and allowed myself to play.   Next I started thinking about the process for making the rings laminating plywood, which made me think back to earlier work


Which reminded me I had been neglecting some of the functional things I had intentions of making.  Which might also double as a pedestal for Argo. 

Plywood and cast glass end table 


 Plywood Plantstand 


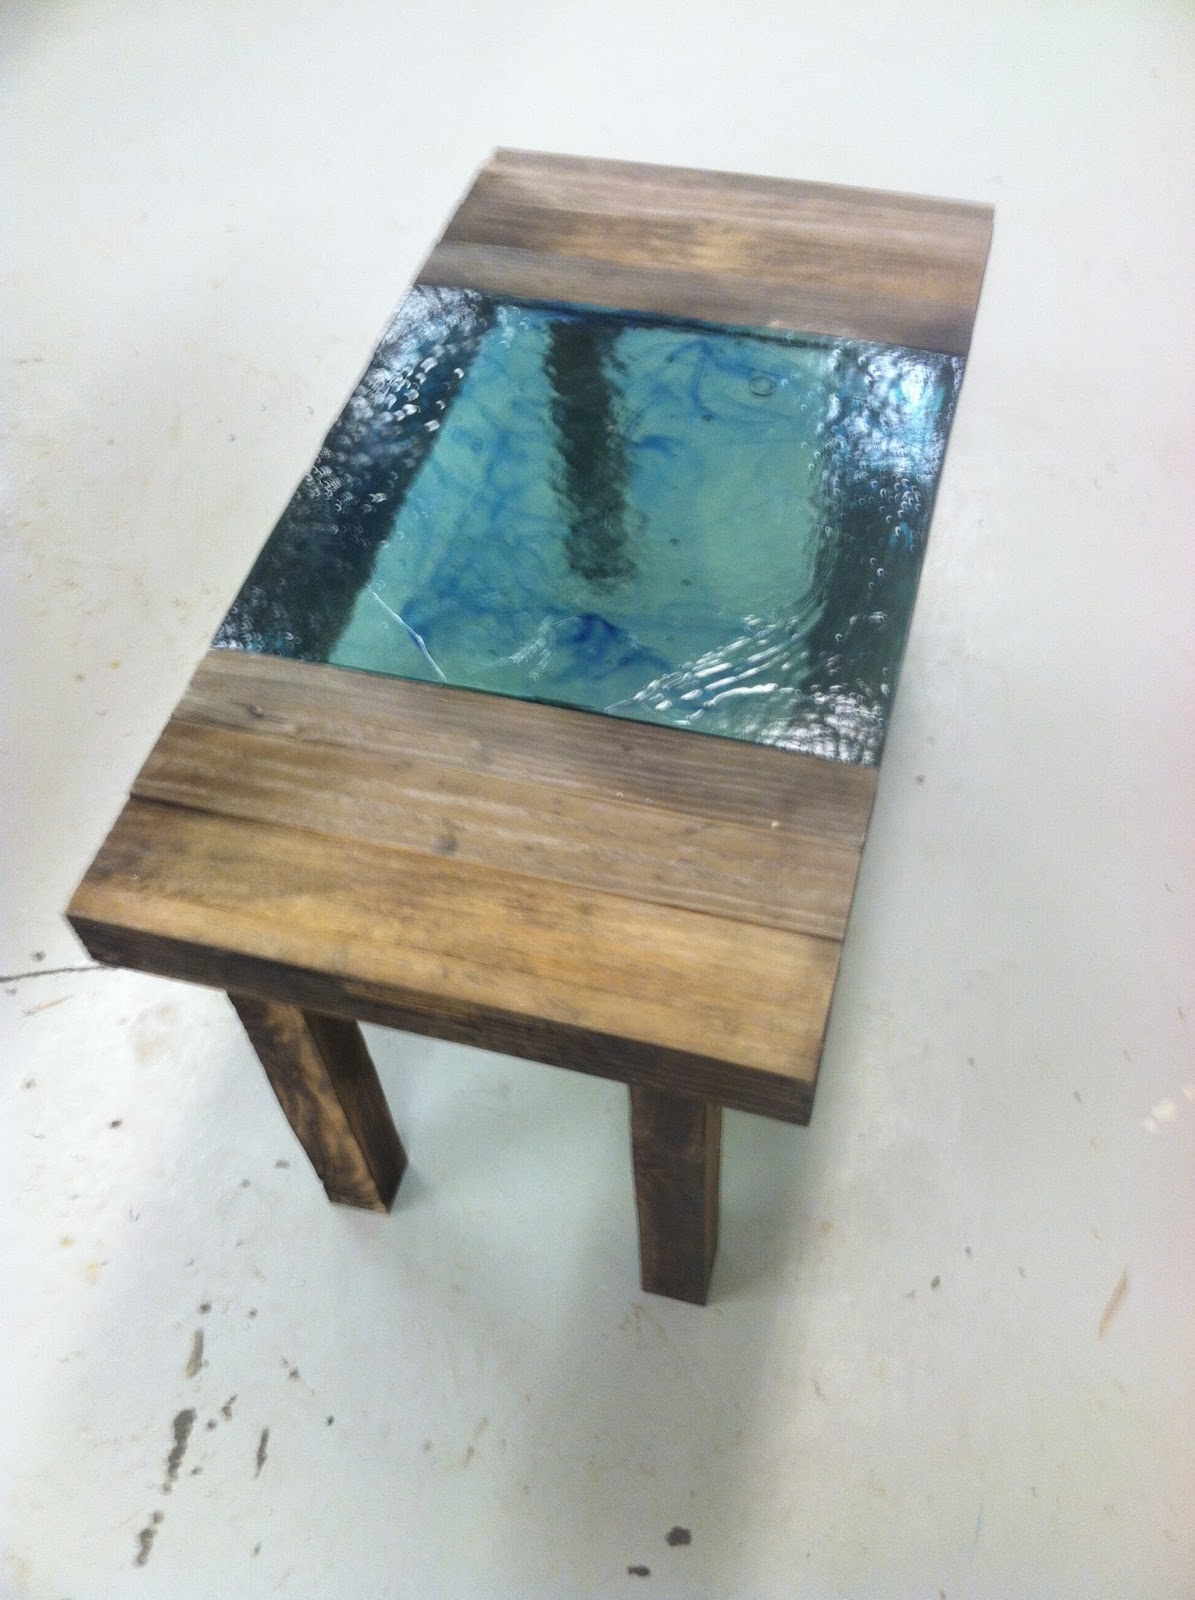
Reclaimed Pine and Blue Glass Table 


So I still have not finished the original idea, I will but first I think I want to install it a different way


But I will have 10ish  finished pieces as a response to a single drawing.

Friday, August 7, 2015

Fuctional things are easy on my brain.

       So my thesis show for my MFA at Tulane is March 2nd -11th.   I don't know the date of the reception yet but that isn't the point.  The point is that thought runs through my head like a scary, exciting but mostly scary ALARM BELL.  A couple times most days, this is extra stressful right now because Tulane's furnaces are cold for the summer.  My brain knows casting right now would be kinda awful but it doesn't prevent the anxiety.  Normally when I am stressed in the studio, I blow glass cups.  It's easy, I can do it by myself and you end up with a finished product.  But our furnaces are cold, you see its starting to become a cyclical problem.  So I thought to myself what other processes to I find intrinsically soothing.  
       Cold working, did a couple days of that but it wasn't doing the trick, and it takes forever to get to a finished product.  Then I remember that, I am perhaps best at production wood working, two years of building big furniture grade crates 40 hours a week and that is not quite 10000 hours but it's a ways towards mastery.  So I snagged some of the wood from the junk pile by my neighbors house and bought a 22 dollar piece of plywood and made a big old mess.  I am gonna walk you through the whole process of one of the tables I made.


 A half sheet of cheap 3/4 in plywood.  I have a truck this week so it was even easy to get the shop


 Then I ripped the plywood down into an obsessive amount of 1 and 3/8 inch strips.  The planner in our shop doesn't work right now so I was just planning on laminated them together and using the table saw to get them down to the one inch thickness I wanted.

Next I used a staple gun and a bunch of wood glue and laminated the strips together.  The clamps are not strictly needed but they will squeeze any tiny gaps left after the stapling and gluing process.  


 I trimmed the my plywood end grain board I had made to fit a piece of glass I had cast this spring.  

For the legs I cut my strips at about 3 inches, so I could end up with four 3" x 3"  plywood legs


More gluing, stapling and clamping


Now I put the base of the table together, you don't see the connections so I glues, screwed and stapled.


Sometimes things are easier to assemble upside down.
   

 It needs is a bit more sanding and a light stain and some poly.   Oh and photographs not taken with my phone.  


 This is the table I made first using just reclaimed pine that I left pretty rough and the parts I did cut I took an acetylene torch to rough back up and make the weathered coloring.  It also needs some sort of a finish but I don't actually know how to finish something that's all toothy and weather.  But I have been asking the Internet some pointed questions and will do some tests.